> For the complete documentation index, see [llms.txt](https://knowledge.carbon.show/llms.txt). Markdown versions of documentation pages are available by appending `.md` to page URLs; this page is available as [Markdown](https://knowledge.carbon.show/carbon-for-unreal/using-and-modifying-assets/user-defined-blueprints/usage-with-take-recorder.md).
# Usage with Take Recorder
### Introduction
This article will cover how to make a user-made blueprint DMX controllable with Carbon's DMX system, and also explain how to setup Blueprint variables that can be recorded with Take Recorder and played back with the Unreal Engine Sequencer.
{% hint style="info" %}
Video Tutorial available on Youtube
[**DMX Controllable and Sequencer Compliant Blueprints Video**](https://www.youtube.com/watch?v=LZKFZdaOxtU)
{% endhint %}
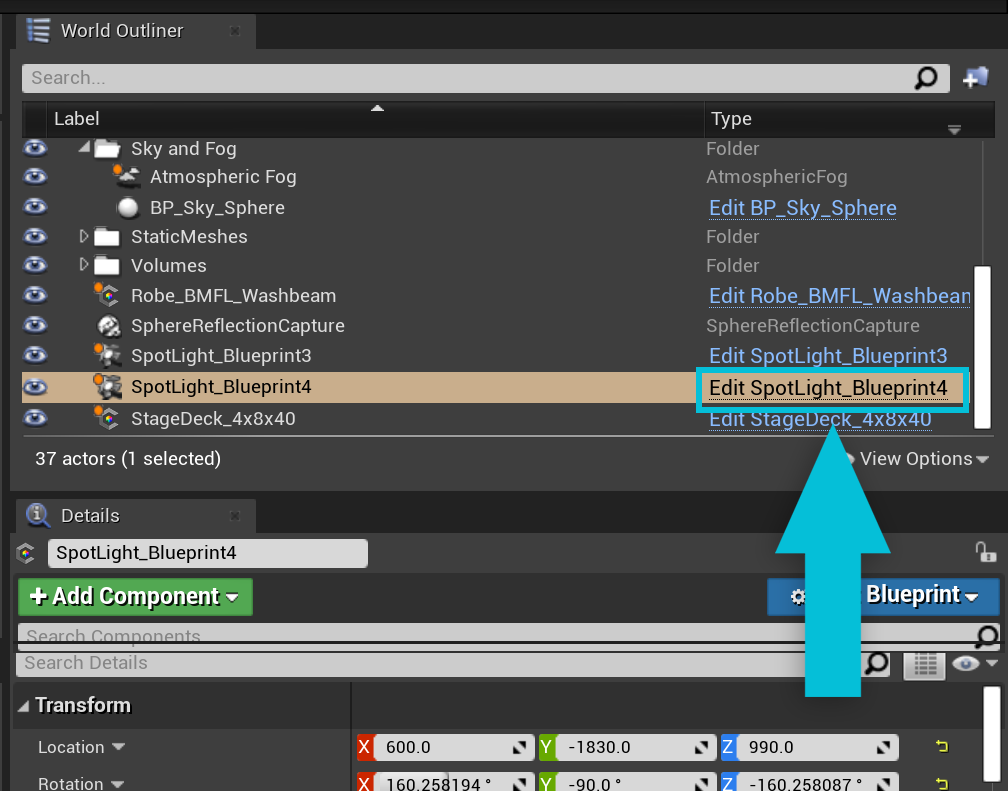
Open up the blueprint you want to control with the Carbon for Unreal DMX system.
In this example we will be controlling the IES Intensity Scale using DMX to control the brightness of a simple Spot Light component. To do this, we will be using the two custom Tick functions that come with the Generic DMX parent class.
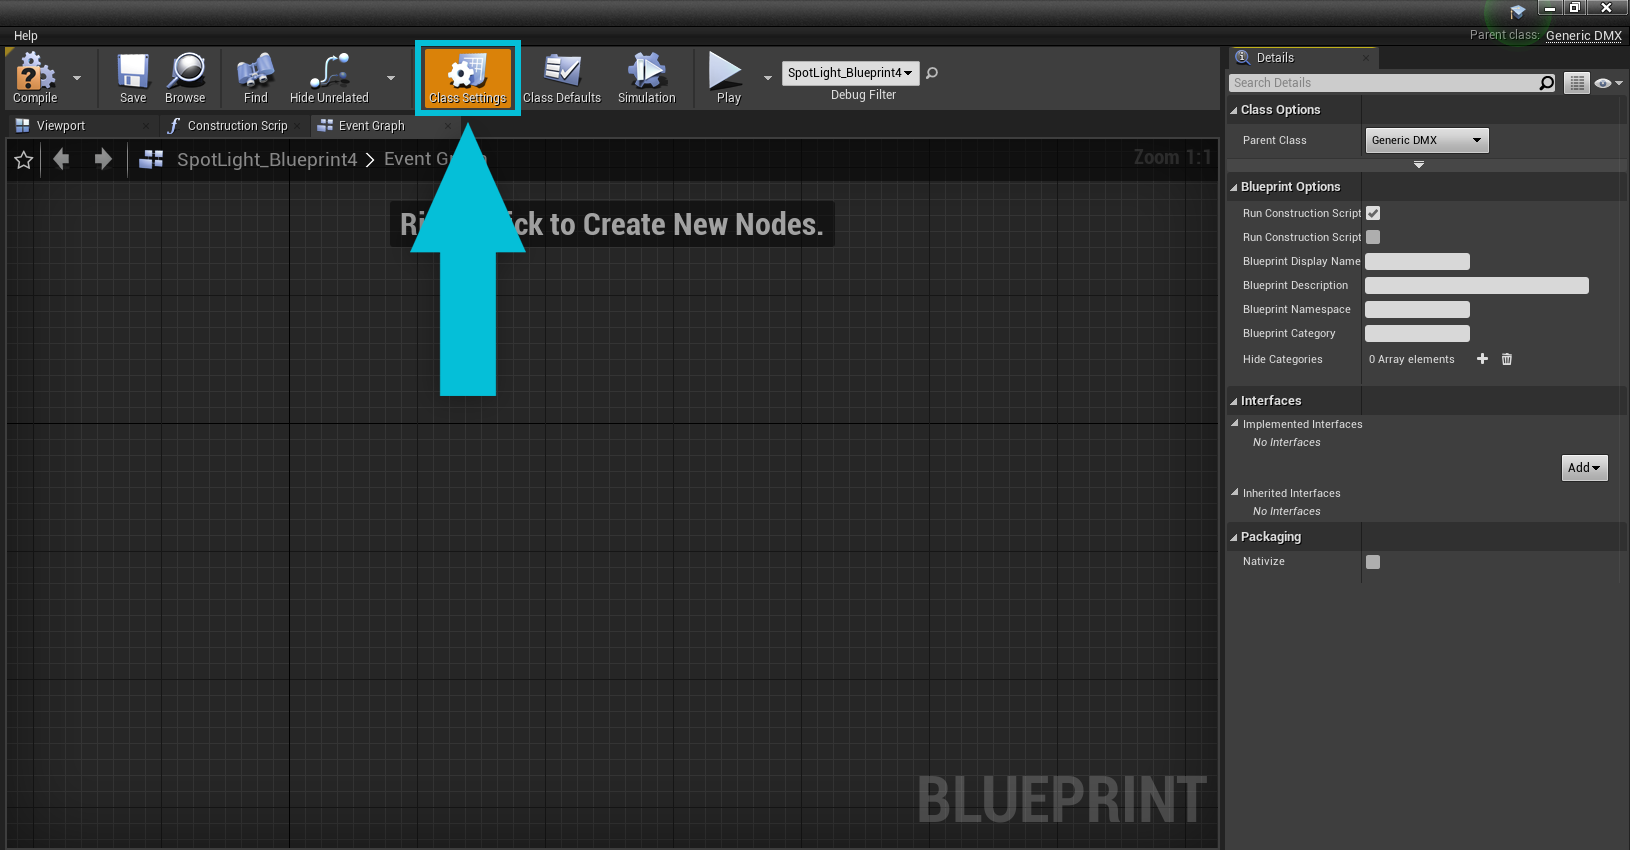
### Class Settings
If your blueprint is not already a child-class of Generic DMX, you can navigate to Class Settings.
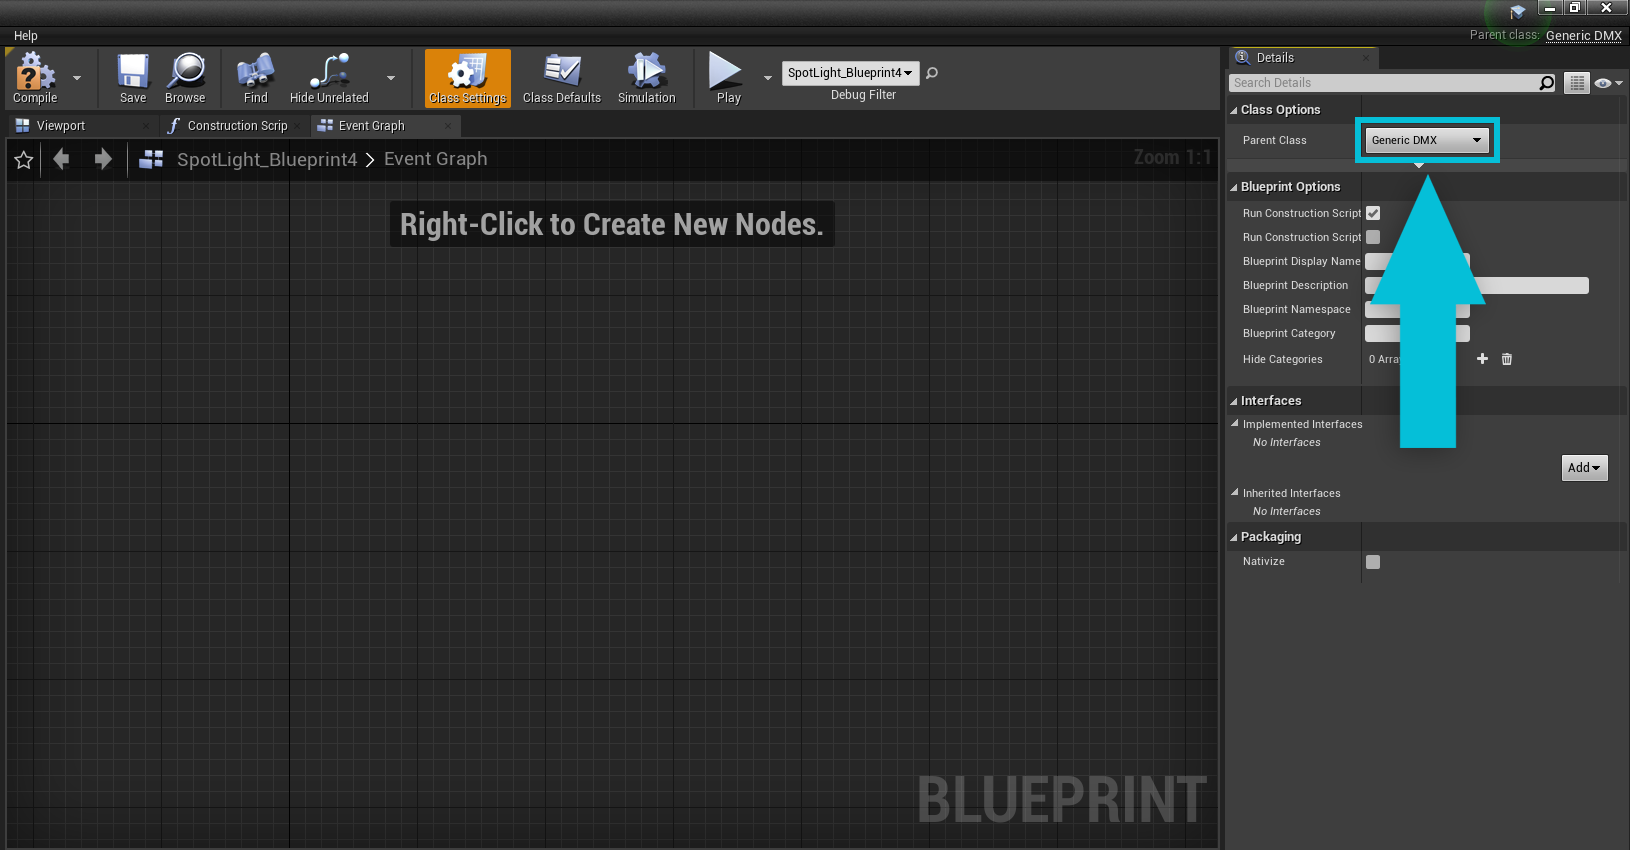
Change the Parent Class to Generic DMX (if it wasn’t already selected).
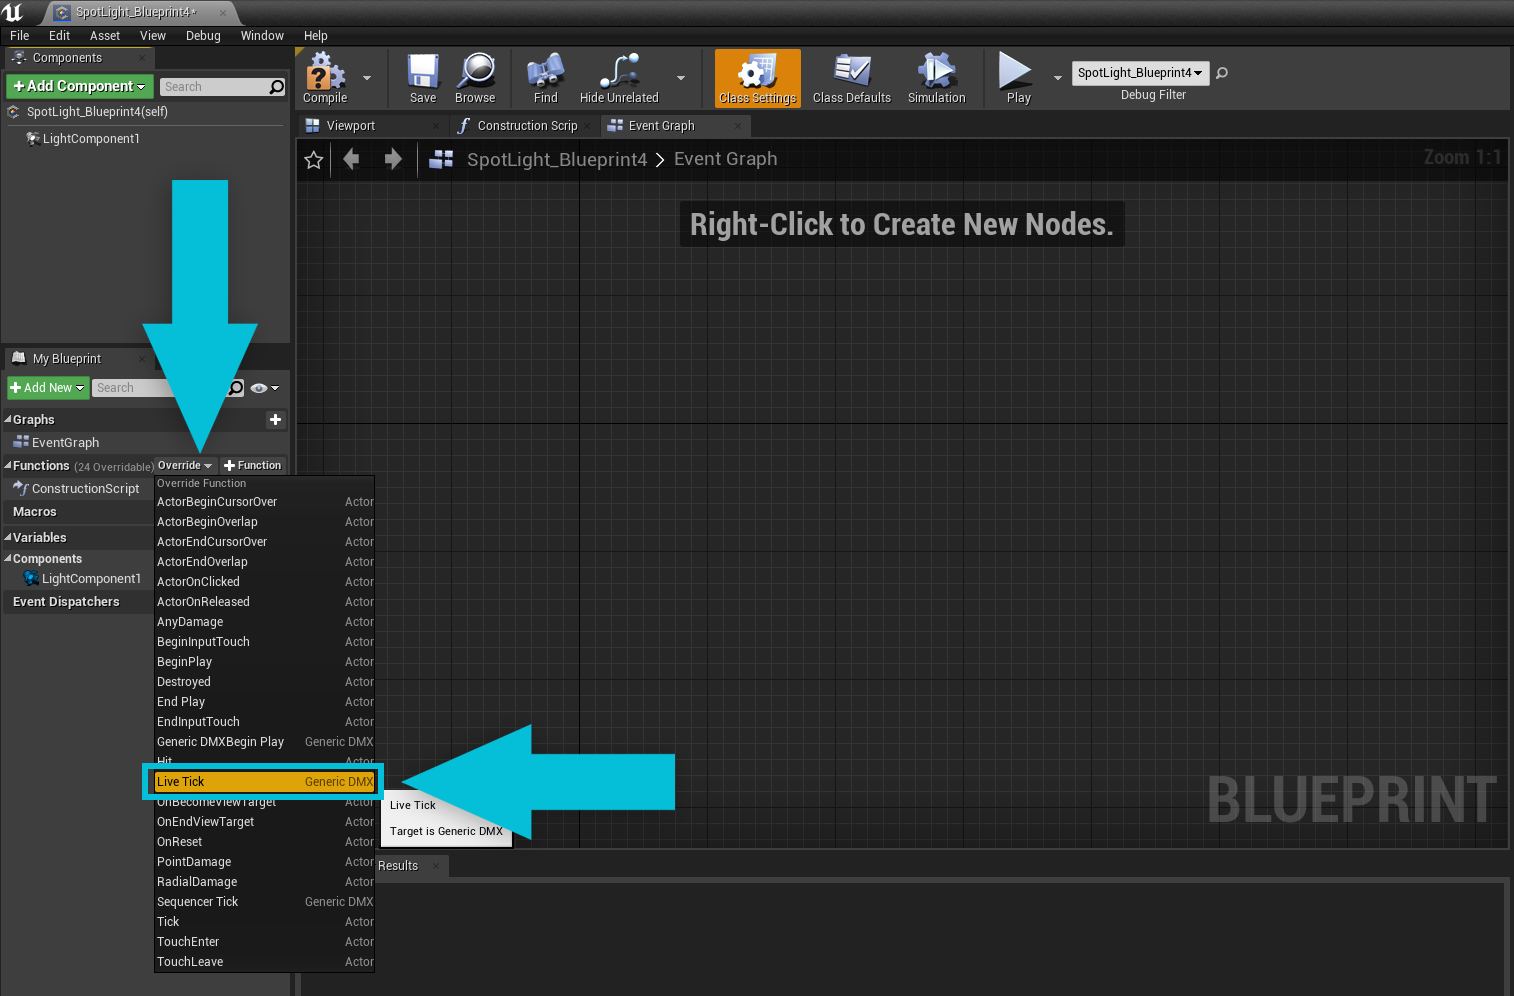
### Event Graph Setup
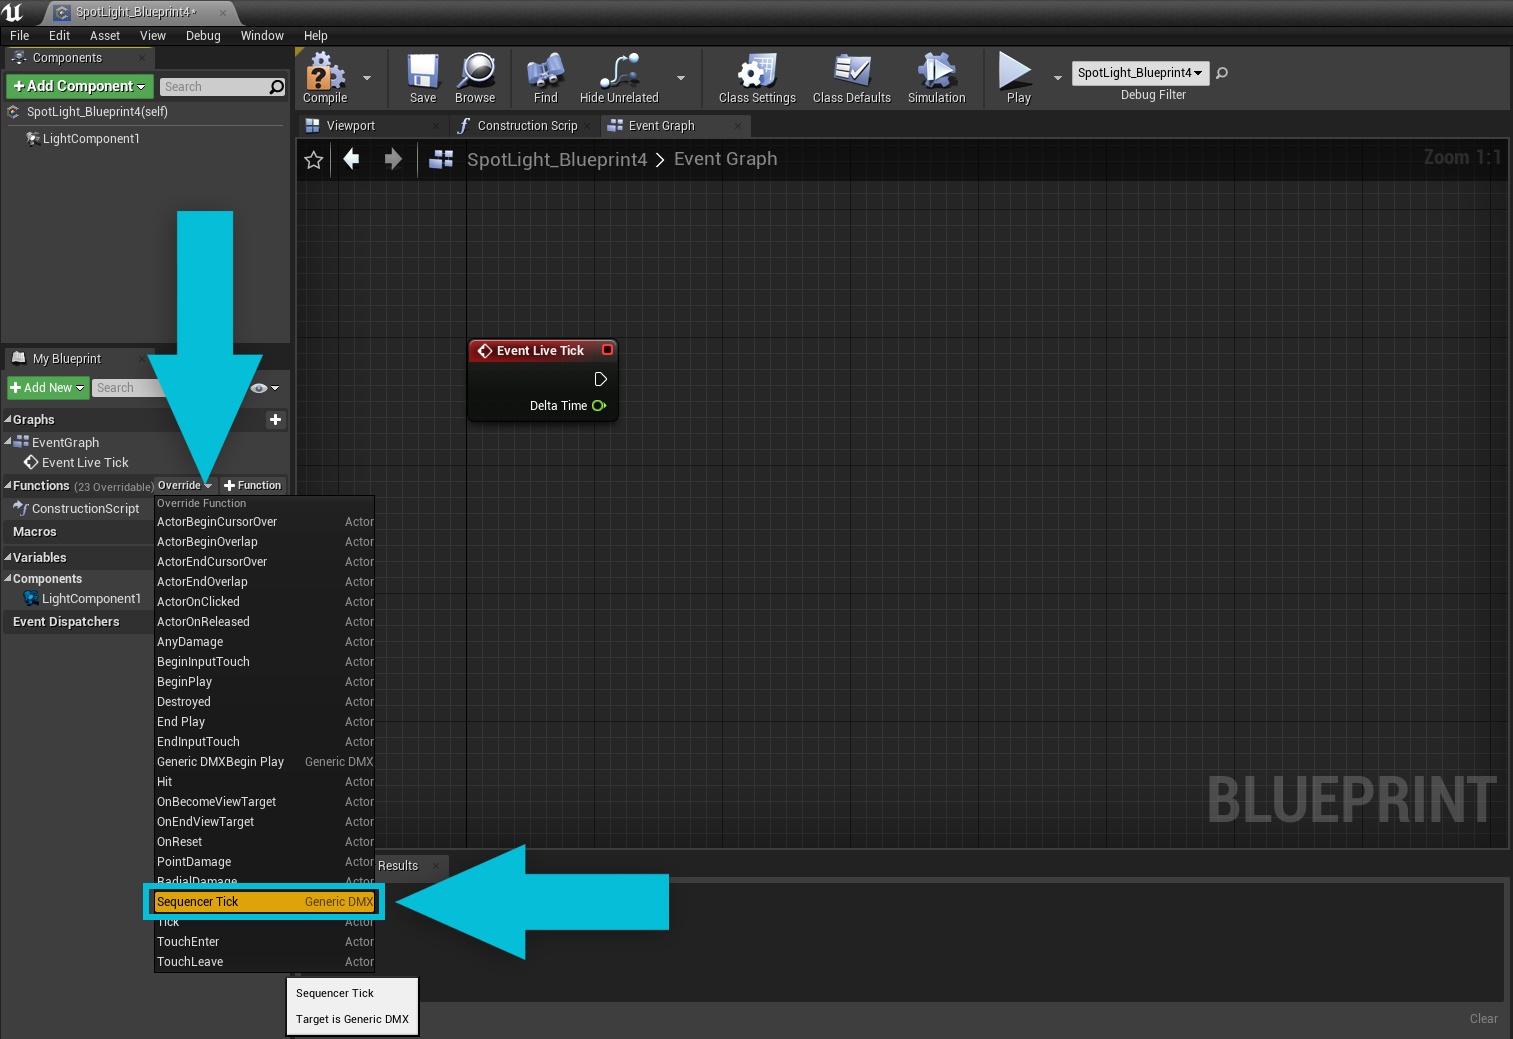
Once you do this, you have access to the **Event Live Tick**. Add the **Live Tick** function to the Event Graph using the functions override dropdown. The **Event Live Tick** runs when the blueprint is in its normal state.
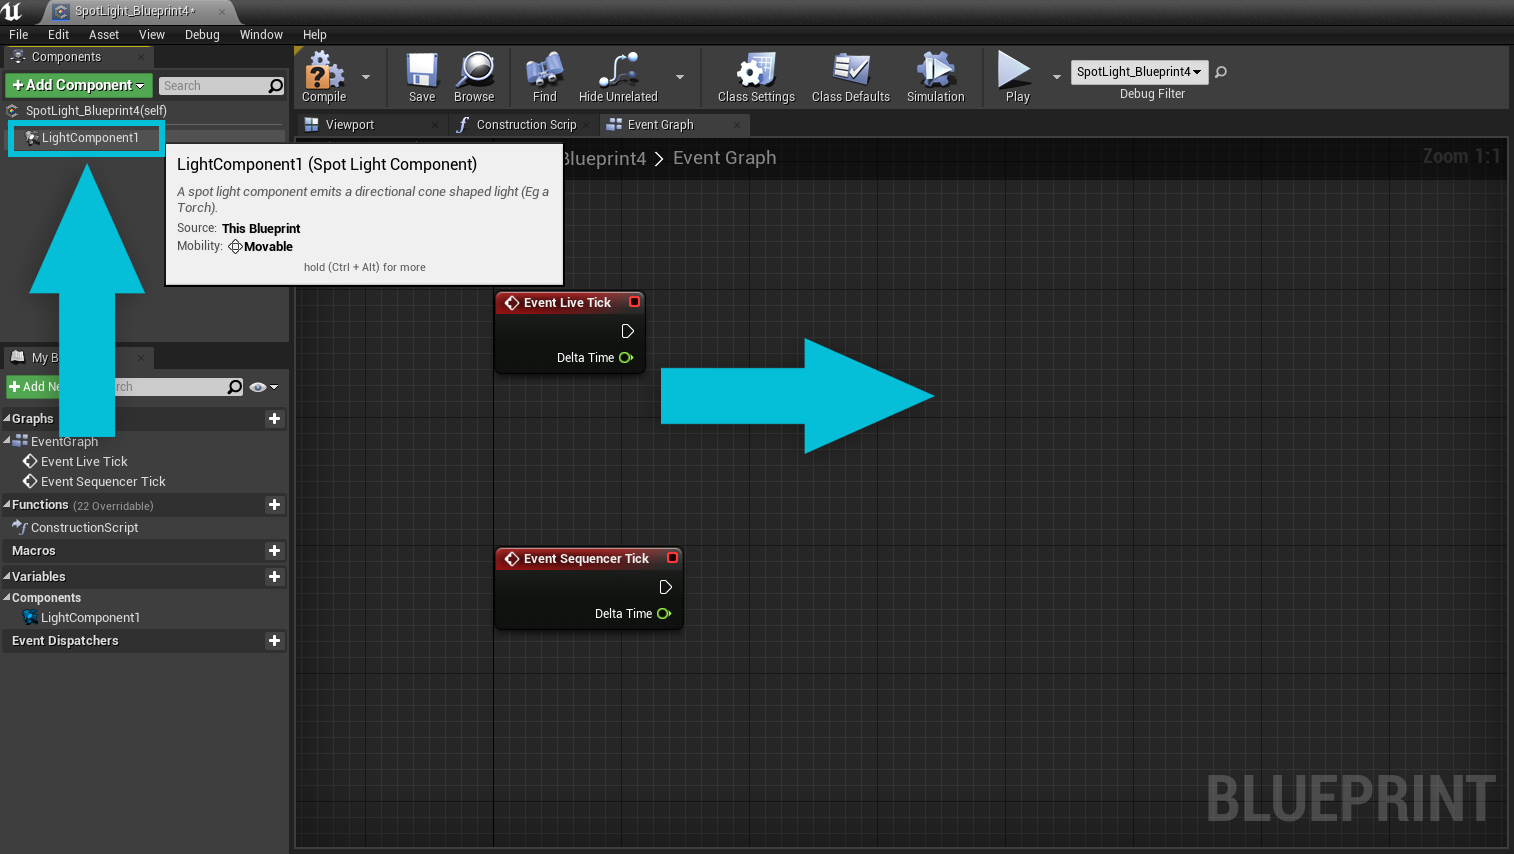
Then, add the **Event Sequencer Tick** function to the Event Graph. The **Event** **Sequencer Tick** only runs when the blueprint's Use Sequencer checkbox is enabled in the Simulation section of the details panel. Enabling Use Sequencer disables **Event Live Tick**.
Now, let’s set up DMX control. We will drag the component we want to control into the Event Graph.
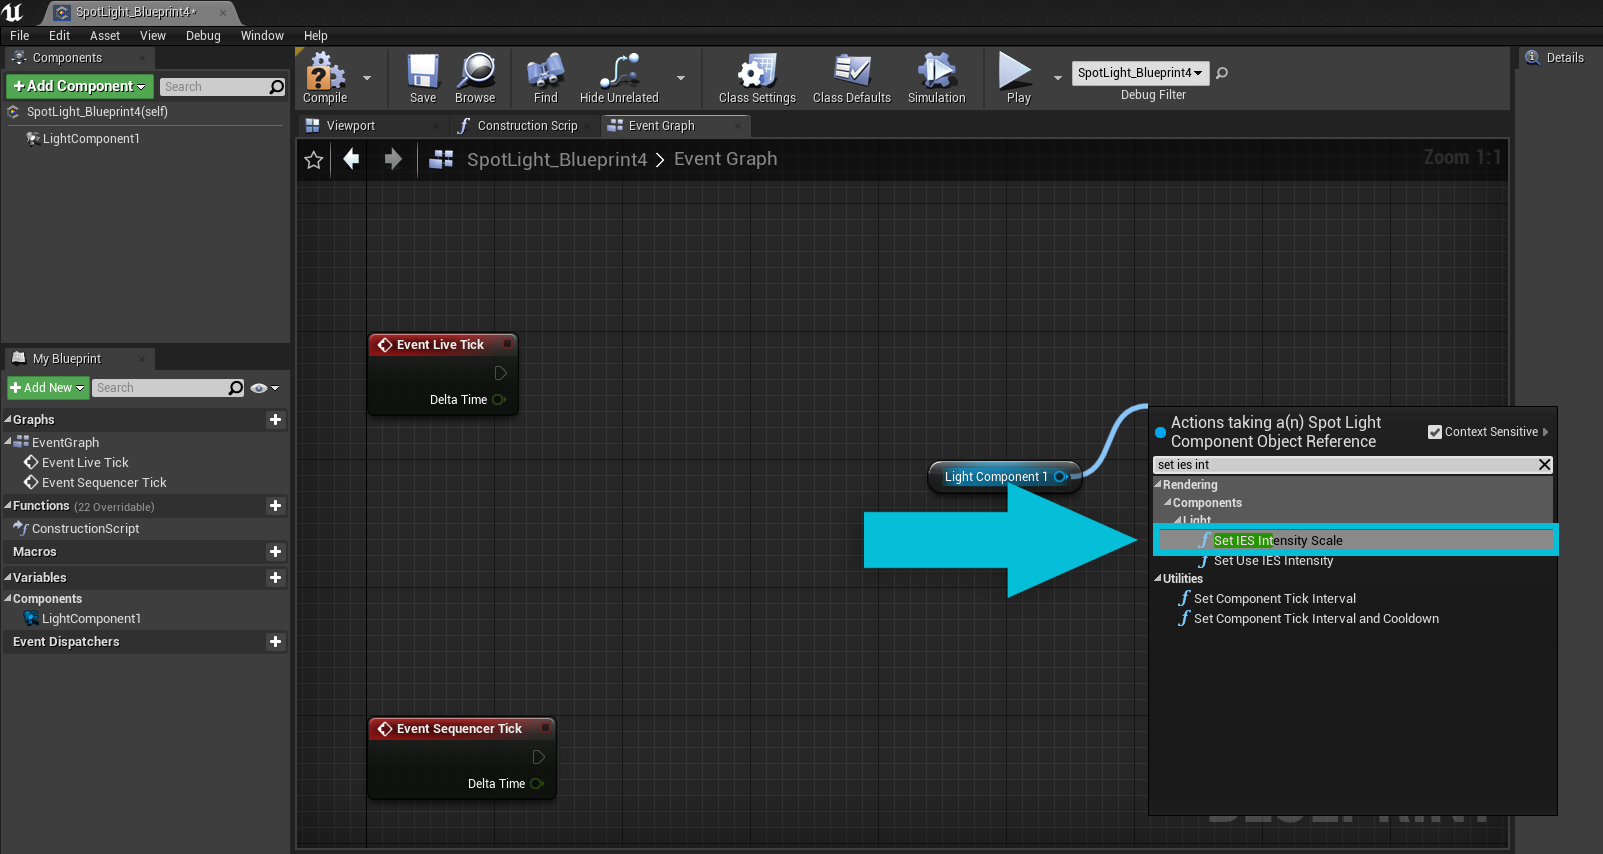
In this example we are controlling the IES Intensity Scale of our Spot Light component. We will drag from the light node and search for **Set IES Intensity Scale**.
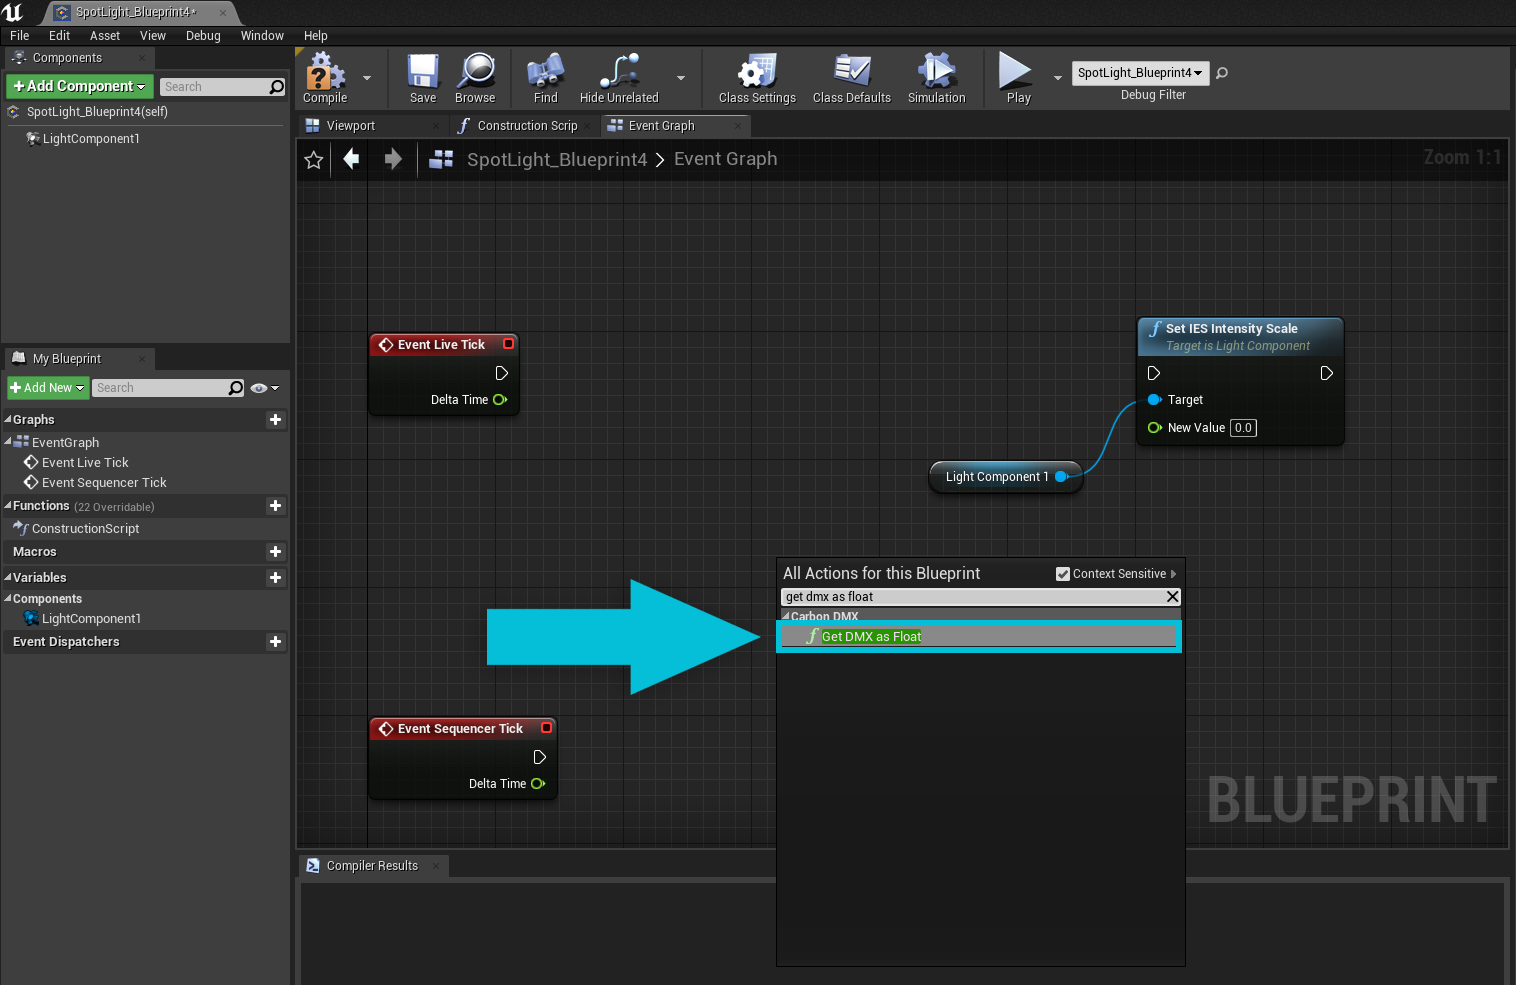
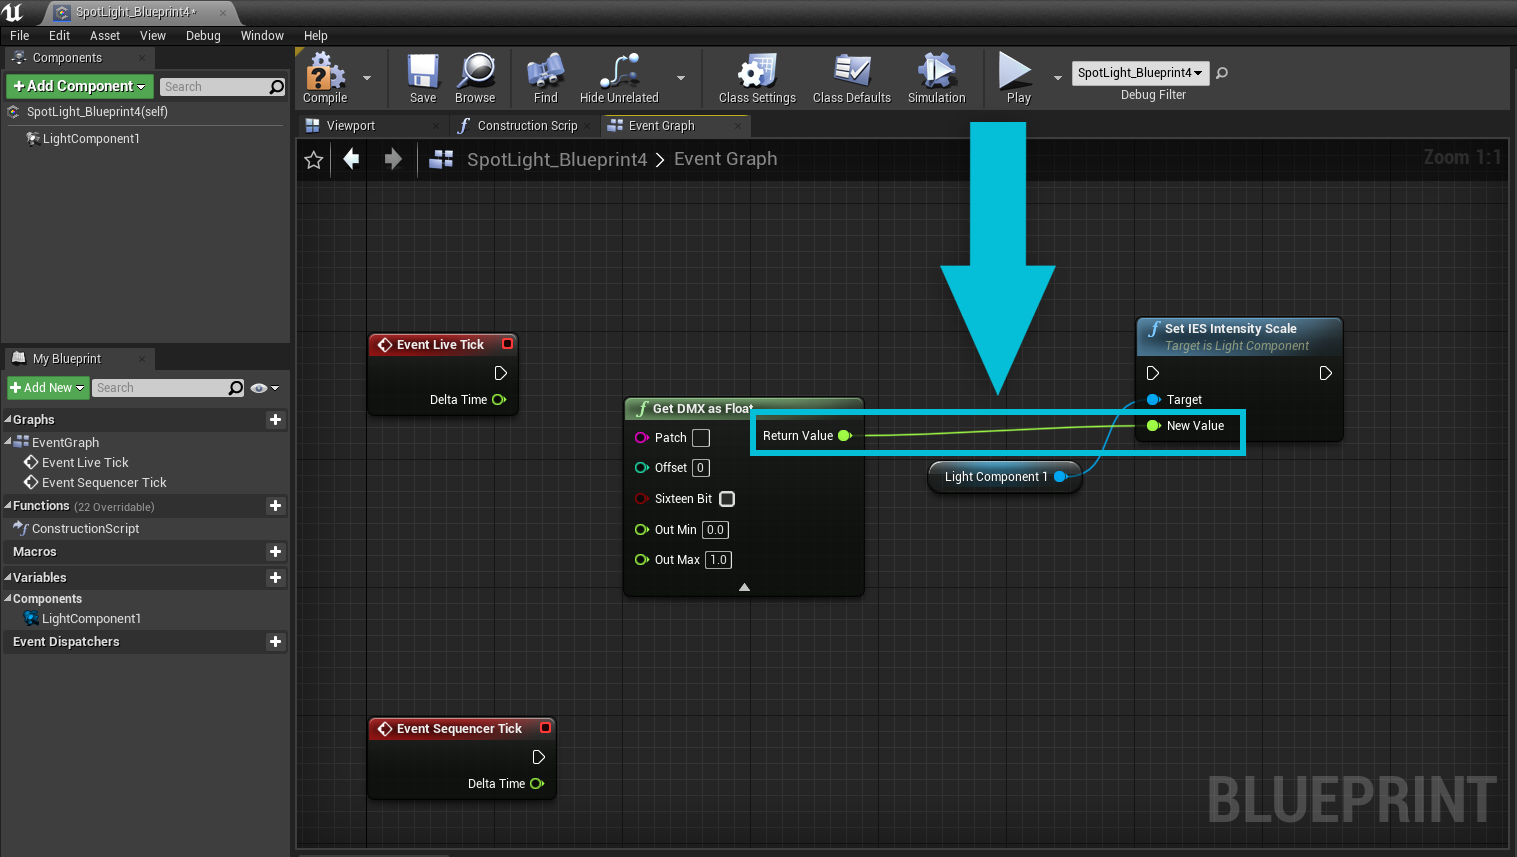
**Set IES Intensity Scale** takes a Float for its New Value. We need to get our DMX as a float value to control this parameter. Right-click on the Event Graph background to search for the function **Get DMX as Float**.
Connect the **Get DMX as Float** function output **Return Value** to **New Value** of the **Set IES Intensity Scale**.
Change the Out Max value of **Get DMX as Float** to 0.002, which will take the channel's value and remap it between the Out Min and Out Max values. In this case 0 - 0.002 for our IES Intensity Scale
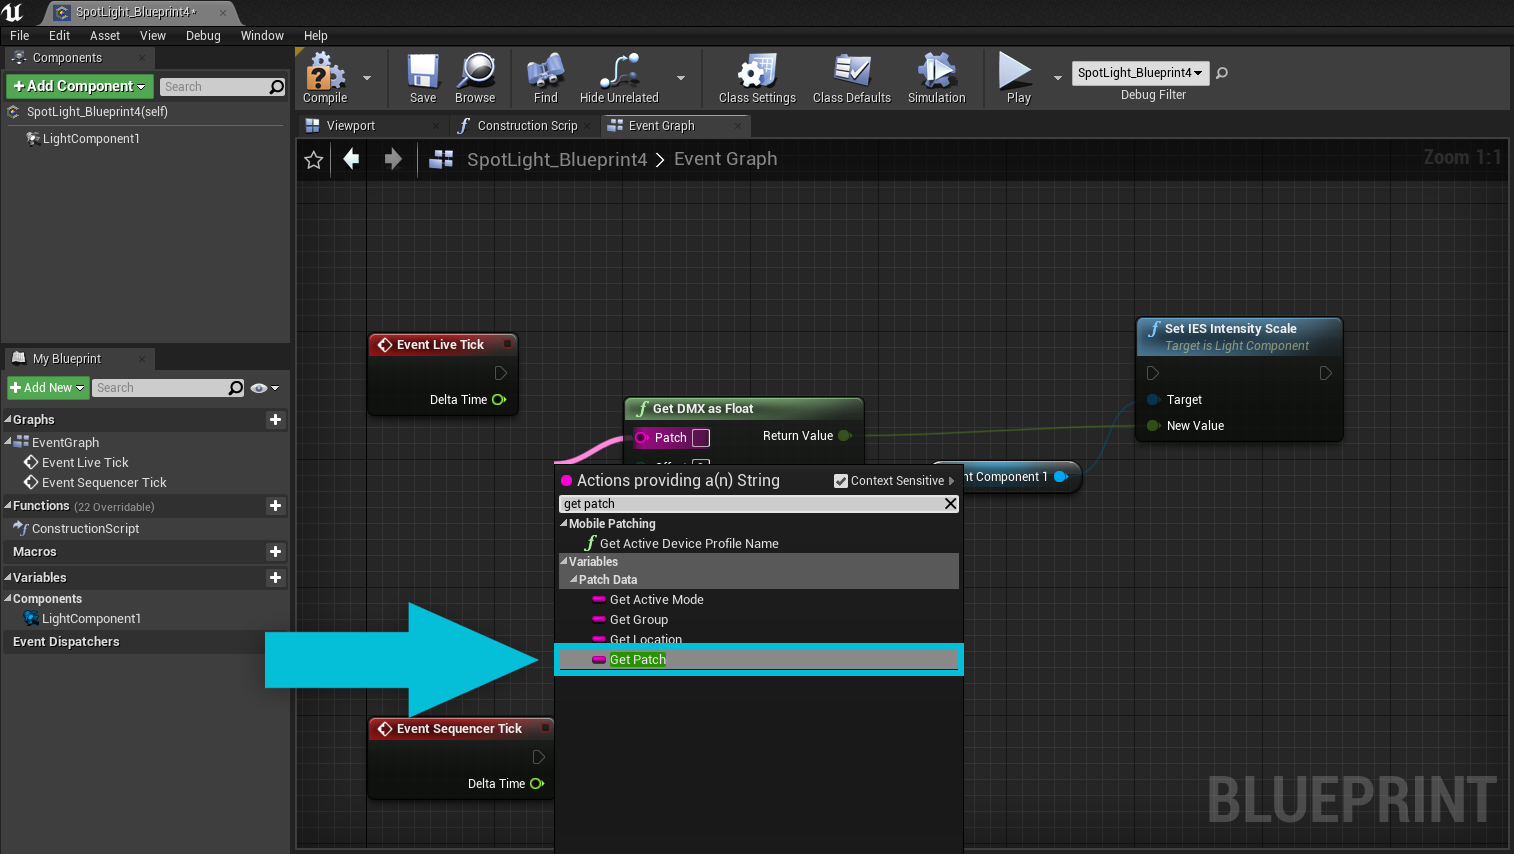
Drag off from **Patch** (on the **Get DMX as Float** function) and search for **Get Patch** to get the built-in patch value of the Generic DMX parent class. You can set this patch in the details panel of the blueprint instance in your scene.
If you have a blueprint that needs more than one channel of control, you can add multiple **Get DMX as Float nodes**. Make sure to change the Offset for each of them, 0 offset is the channel of the Patch, positive Offset values will get subsequent channels. If any parameters are Sixteen Bit with sequential course and fine channels, you can enable that option.
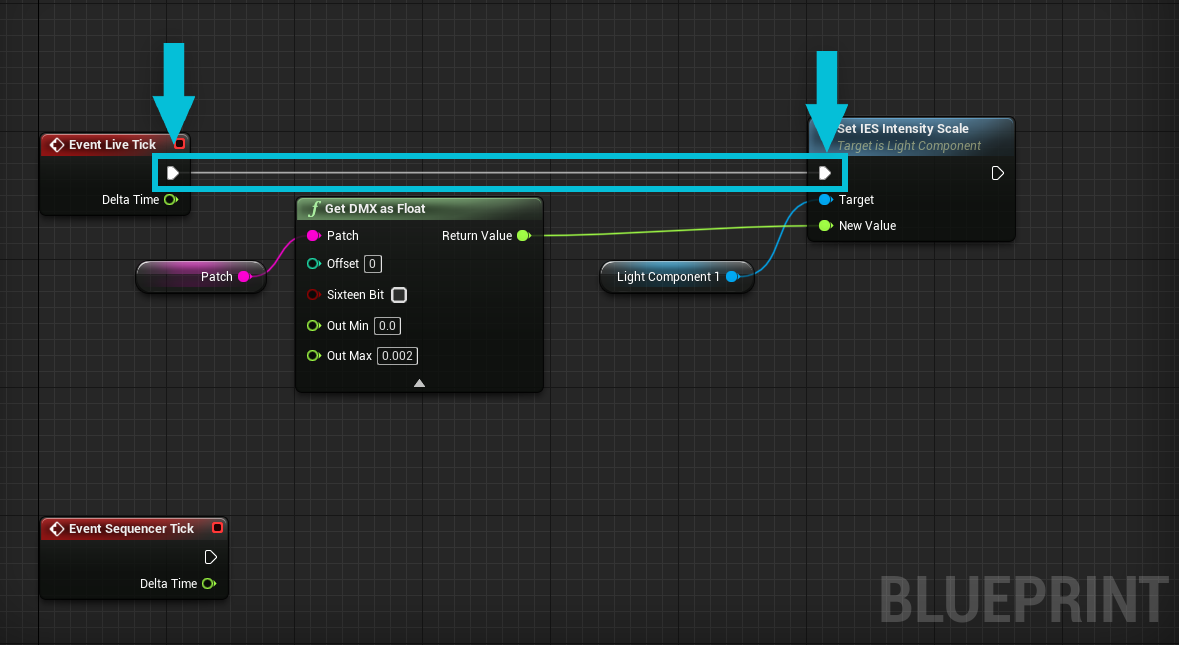
Connect the execution line from **Event Live Tick** to **Set IES Intensity Scale** to finish the **Event Live Tick**.
With these nodes connected (see picture below), as the **Event Live Tick** runs it is going to set the IES Intensity Scale based on the DMX value of our patch in Play Mode. This Blueprint is now DMX controllable with the Carbon for Unreal DMX system. If you do not need recording and sequencer capabilities (i.e. you are only visualizing live DMX data) you can stop here.
### Setting up recordable variables
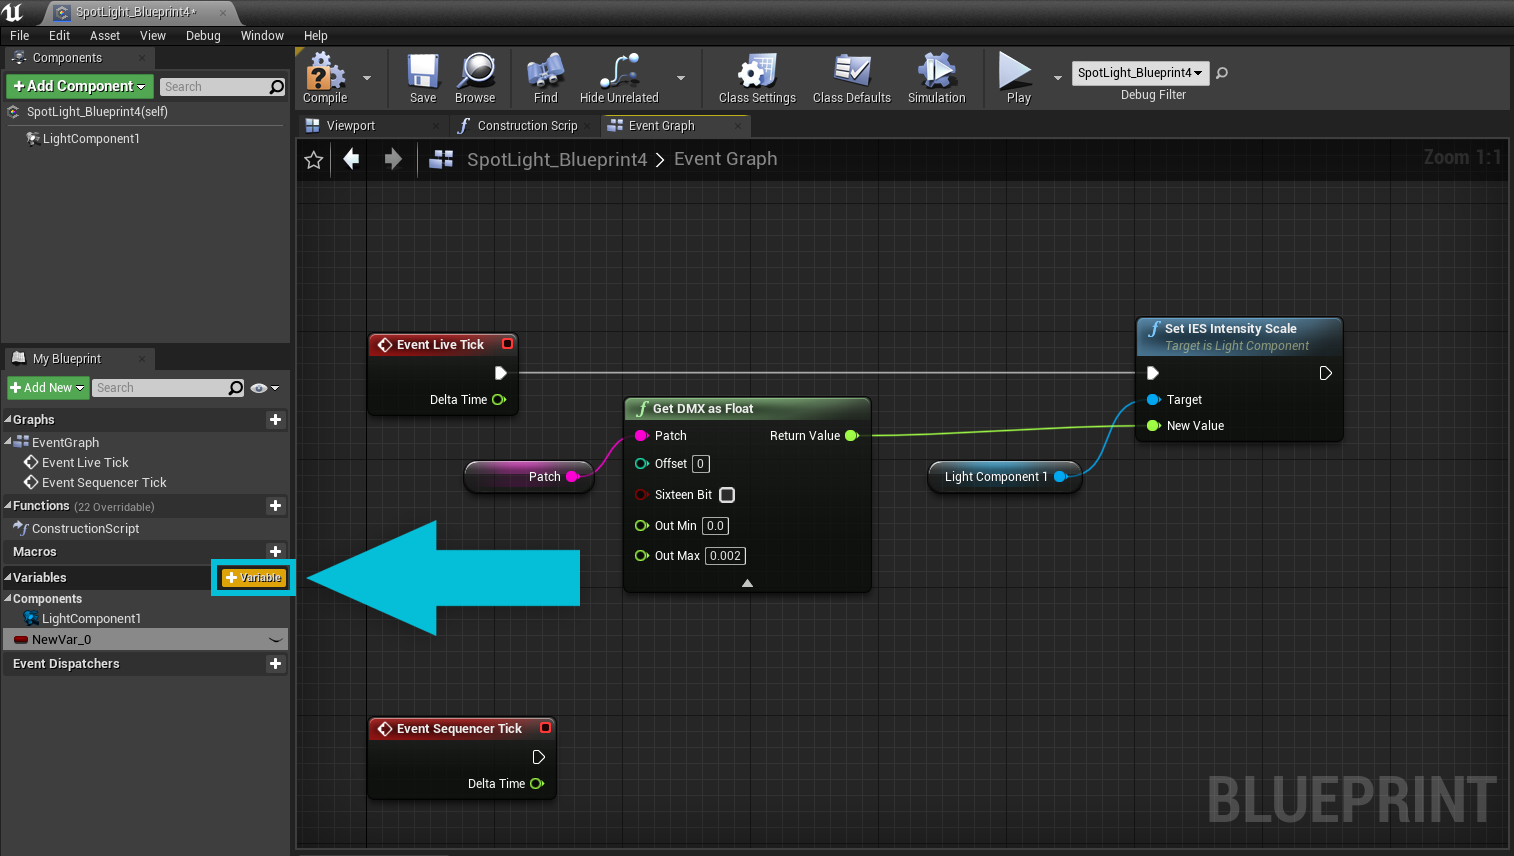
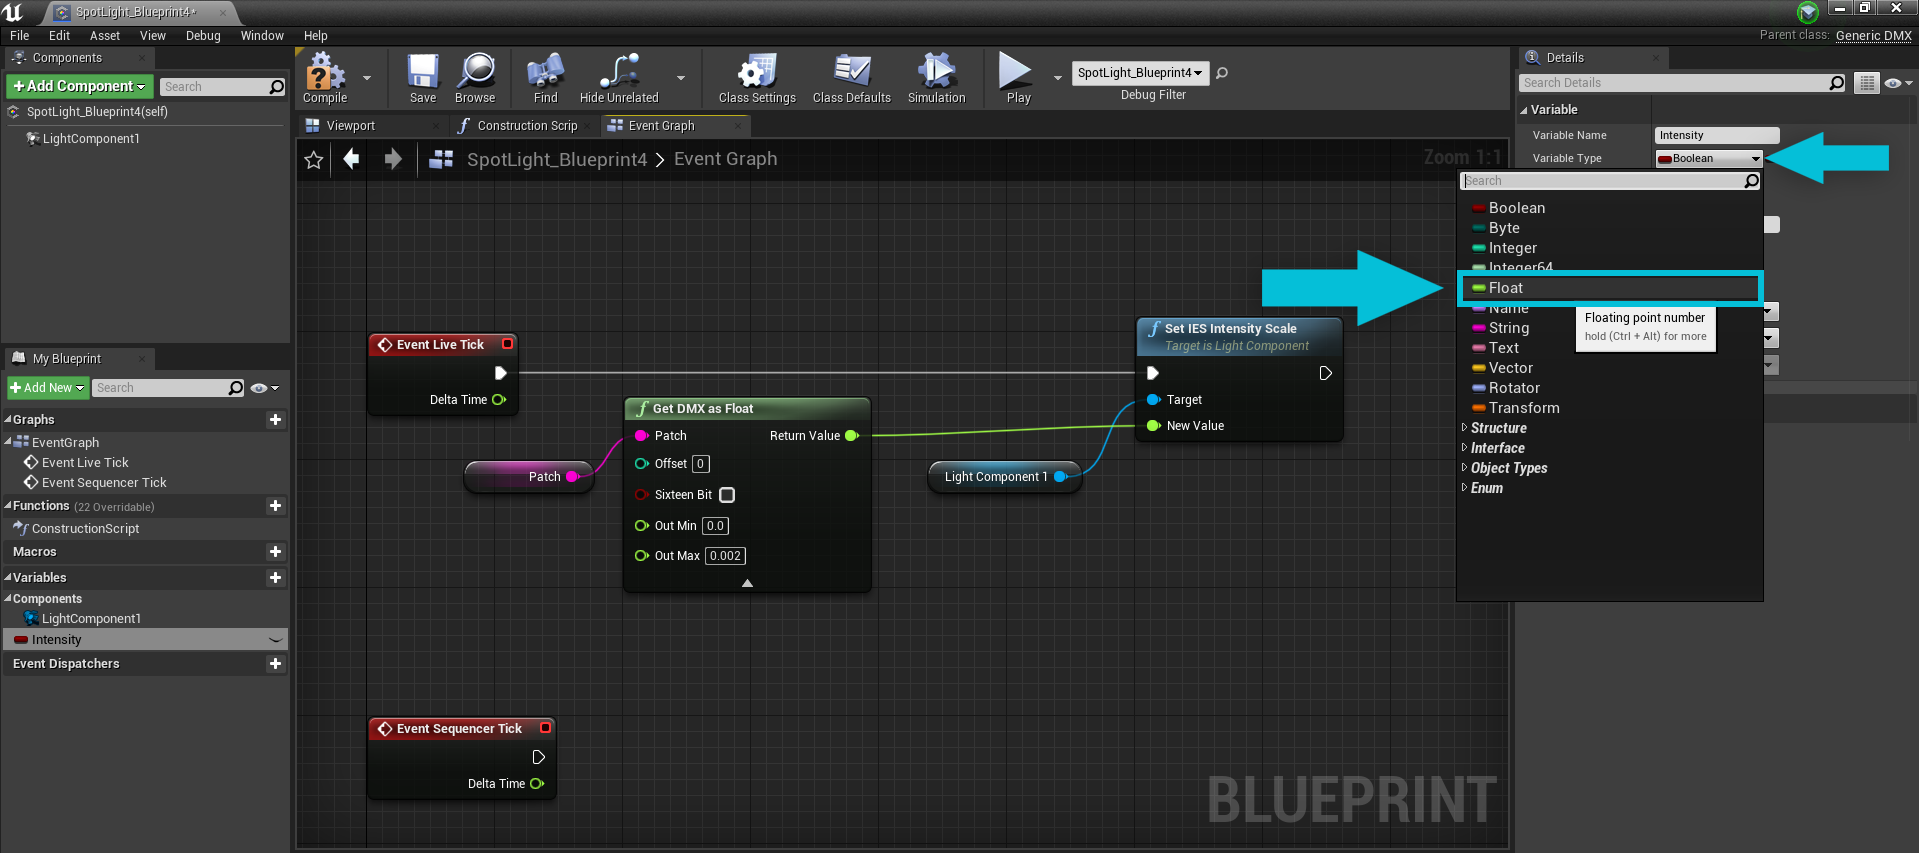
To record this value for playback in the Sequencer, we need to create a variable that is exposed to the Unreal Engine cinematics system.
For our example will make a new variable of type Float, and name it something relevant (we chose Intensity).
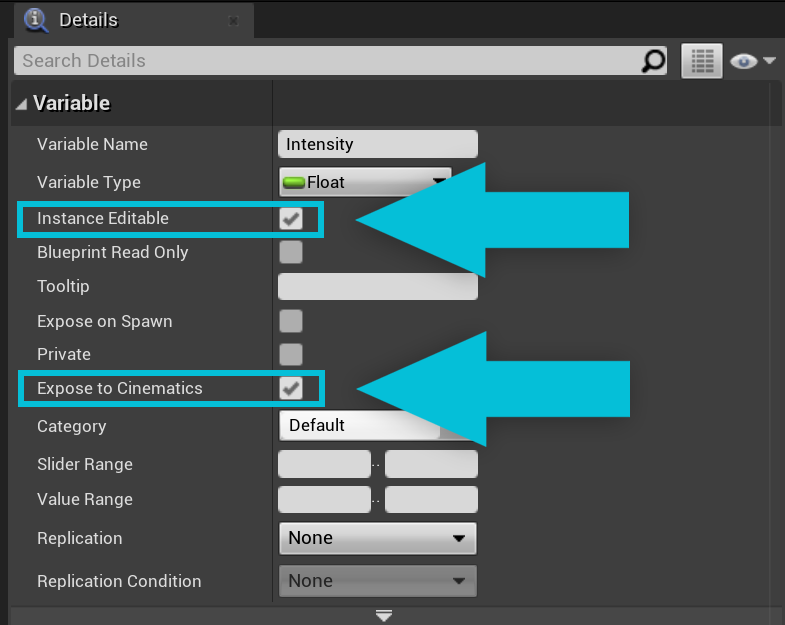
Check the boxes next to **Instance Editable** and **Expose to Cinematics** in the new variable's detail panel. Both are required to allow this value to be recorded.
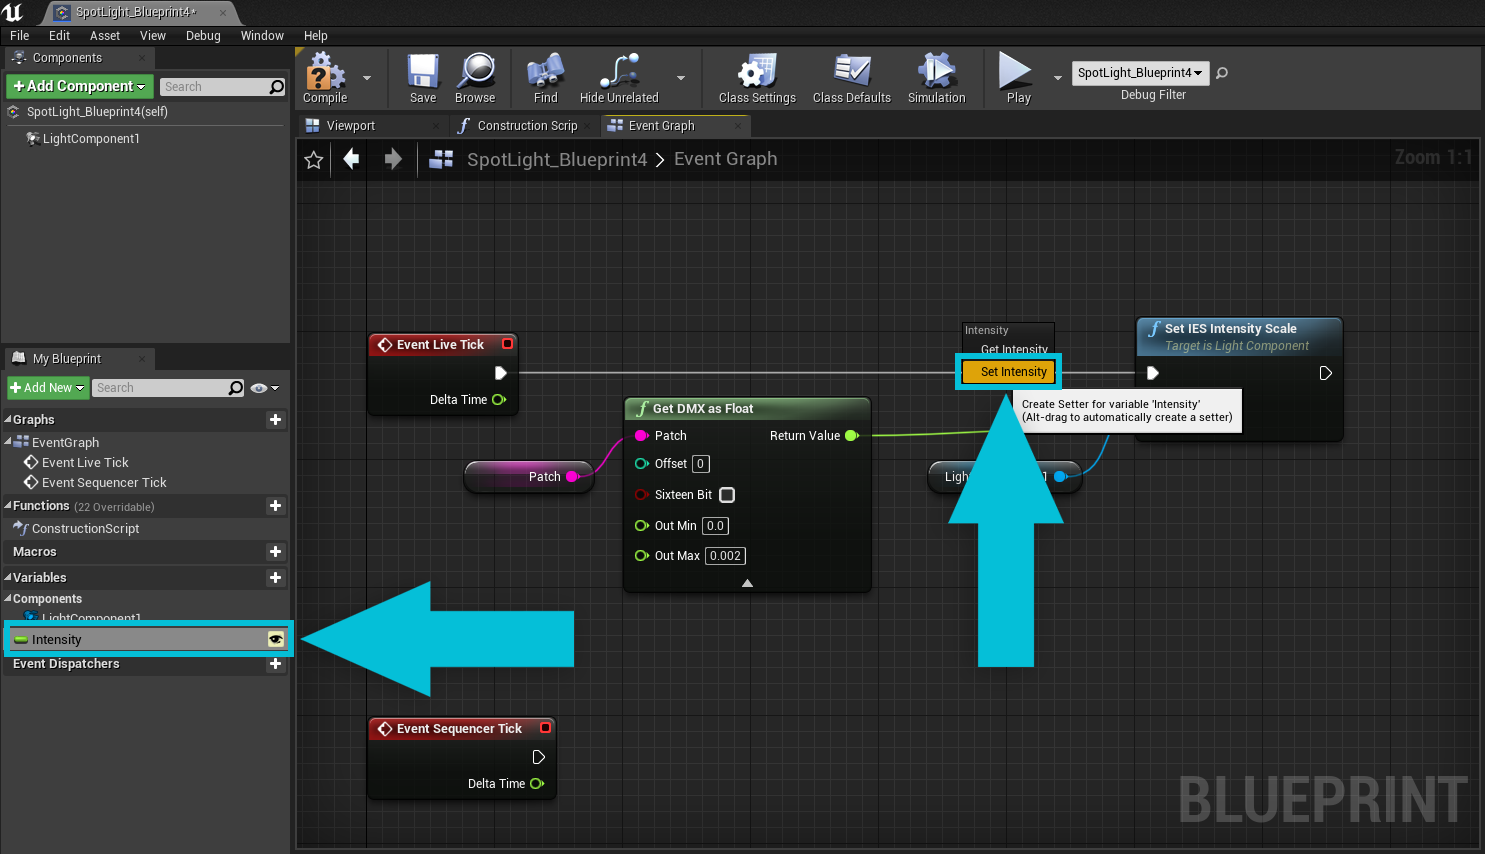
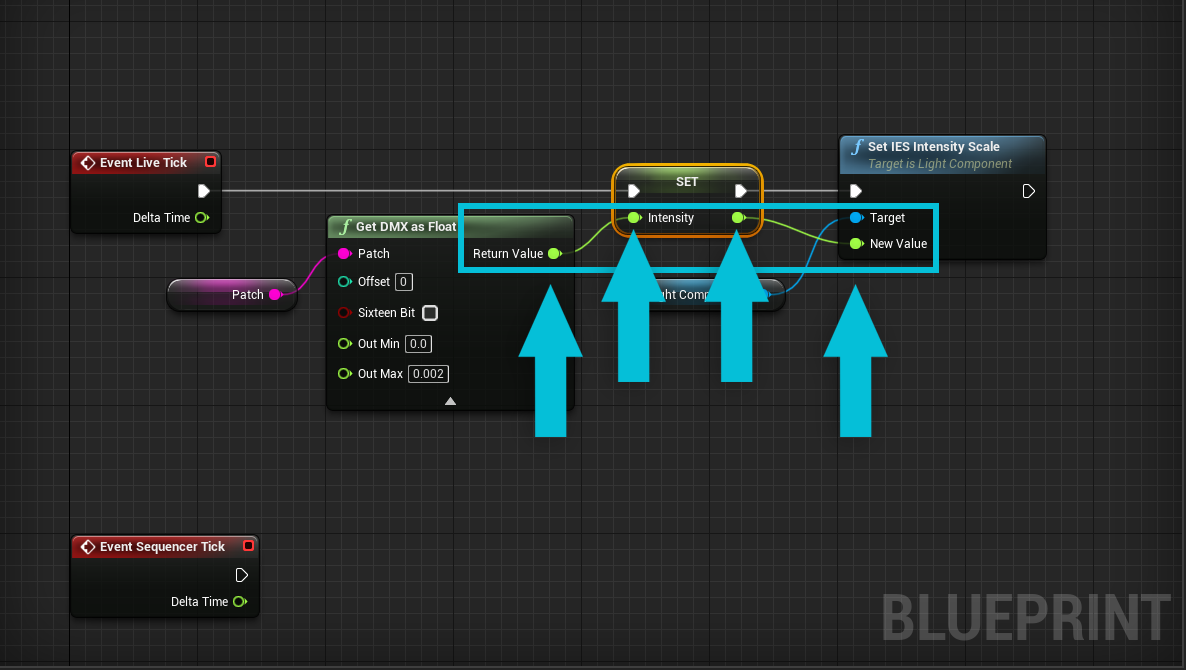
Drag the variable on to the Event Graph, and choose **Set \[Variable Name]** (in this case **Set Intensity**).
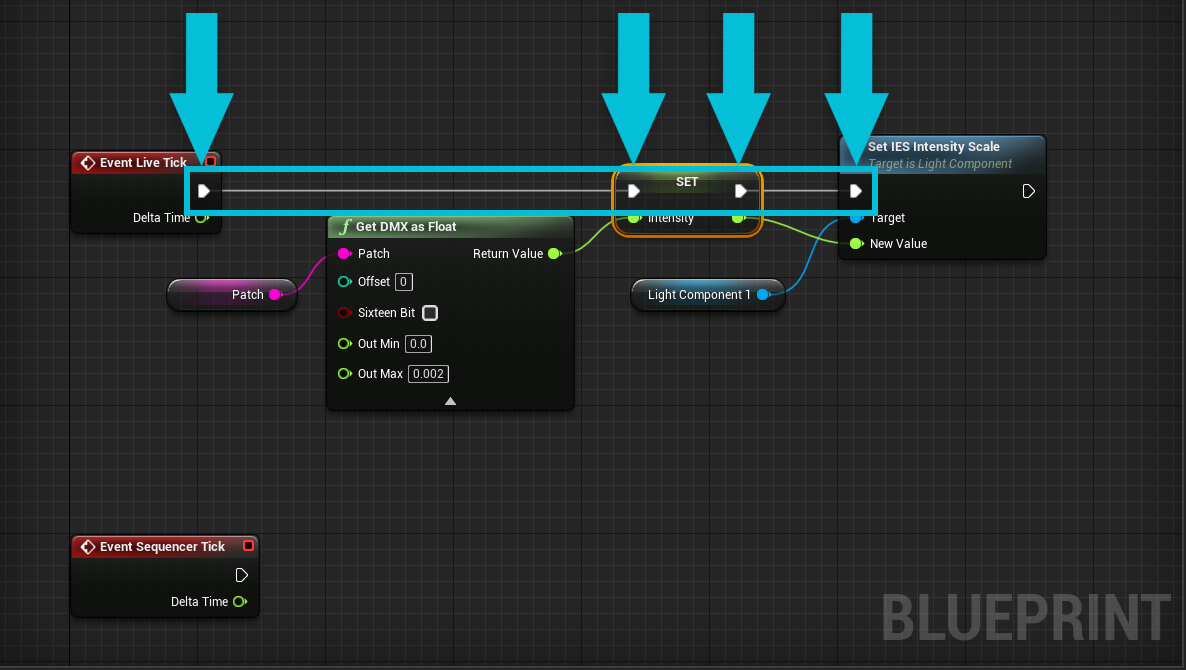
Connect **Event Live Tick’s** Execution Output to the variable’s Execution Input of SET, then the Execution Output of SET to the Execution Input of **Set IES Intensity Scale.**
Make sure to connect the **Return Value** of **Get DMX as Float** to the Intensity variable, and connect the Intensity variable to the input of **New Value** on the **Set IES Intensity Scale** function.
The value of IES Intensity Scale will now be captured by the Take Recorder when recording.
Now, on to the **Event Sequencer Tick**. When we are playing back recorded data from the sequencer we do not want to be using live data from our DMX connection. Instead, we want to use the values stored in the variable. Grab another copy of the variable (Intensity), and drag in to the Event Graph. Choose **Get \[Variable Name]**, as the sequencer will be controlling this variable during playback. For this example will add another copy of Set IES Intensity Scale and the target component, and connect them all together; execution line from Sequencer Tick to Set IES Intensity Scale, component to target, and our variable to New Value.
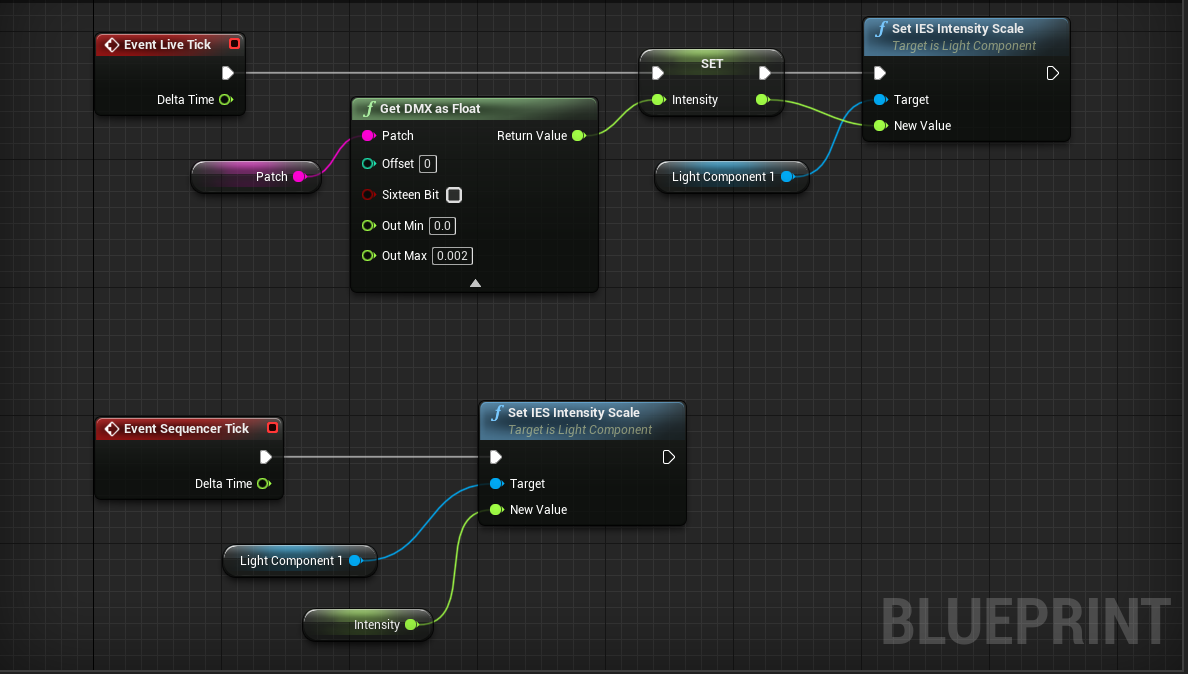
As the Intensity value changes during sequencer playback it will use the Sequencer Tick instead of Live Tick and update the **IES Intensity Scale** based on the recorded values of our variable.
**Congratulations, you have successfully made a blueprint that is DMX controllable and and DMX Recorder compliant!**